With dozens of styles, sizes and price points on the market, picking the right glamping tent can feel harder than the trip itself. A roomy canvas bell tent might be perfect for a lazy week in a meadow, yet a poor match for a windy ridge or a quick weekend escape. The trick is to match the tent to your trip, not the other way around.
This guide walks you through the decisions that matter: what kind of glamping trip you are planning, the right size and layout for your group, which materials handle your weather, what a glamping tent really costs, when to book, and a packing and setup checklist before you leave. By the end, you will know exactly which tent fits your trip and your budget.
What Kind of Glamping Trip Are You Planning?
Your first big decision is who does the pitching. A self-pitched glamping tent means you transport it, set it up and take it down yourself, which keeps costs low and gives you freedom to camp in more remote spots. A pre-erected tent at a glamping resort arrives already standing, usually with real beds, lighting and sometimes heating, so you can drive straight in and start relaxing.
Match the tent style to the setting
Bell tents suit meadows and festivals, where their round shape and central pole create a welcoming, social space. Dome tents handle exposed viewpoints better, since their low, aerodynamic profile copes with wind far more gracefully. Safari tents, with their sturdy frames and generous floor plans, are made for family campsites where space and comfort matter most.
Trip length should also shape your choice. A weekend away tolerates a simpler, lighter setup that you can pitch in under an hour and repack quickly. A week-long stay justifies heavier, more comfortable canvas, because the extra weight of hauling it is offset by seven nights of genuine comfort. Decide how long you will stay before you decide how much tent you can carry.
Choosing the Right Glamping Tent Size and Layout
Tent capacity labels are optimistic at best. Apply the plus-two rule: a tent sold as a 4-person model comfortably fits 2 adults with luggage. That spare capacity is what turns a cramped night into a comfortable one, giving you room for bags, boots and a change of clothes without sleeping elbow to elbow.
For a couple or small family, a bell tent with a 3-5 m diameter sleeps 2-5 people depending on size. Larger groups should look at safari tents with separate rooms, which sleep 4-8 and give everyone privacy, a real advantage with kids or friends in tow.
Beyond floor space, the details that make a tent livable are easy to overlook. Here is what to check before you buy:
- Standing height: look for at least 1.9 m at the center if you want to walk around and get dressed without stooping all weekend.
- Zipped groundsheets: these let you roll up the sides for airflow on hot days and make cleaning out sand and grass far easier at the end of the trip.
- Mesh doors: essential for ventilation, they keep air moving through the tent at night while blocking mosquitoes and midges.
- Door placement: two doors on opposite sides mean no climbing over sleeping bags for a midnight trip outside.
Sit inside a floor plan before you commit if you can. A tent that looks generous on a spec sheet can feel tight once four sleeping bags, a cooler and two duffel bags hit the floor.
Materials, Weight and Weather Readiness
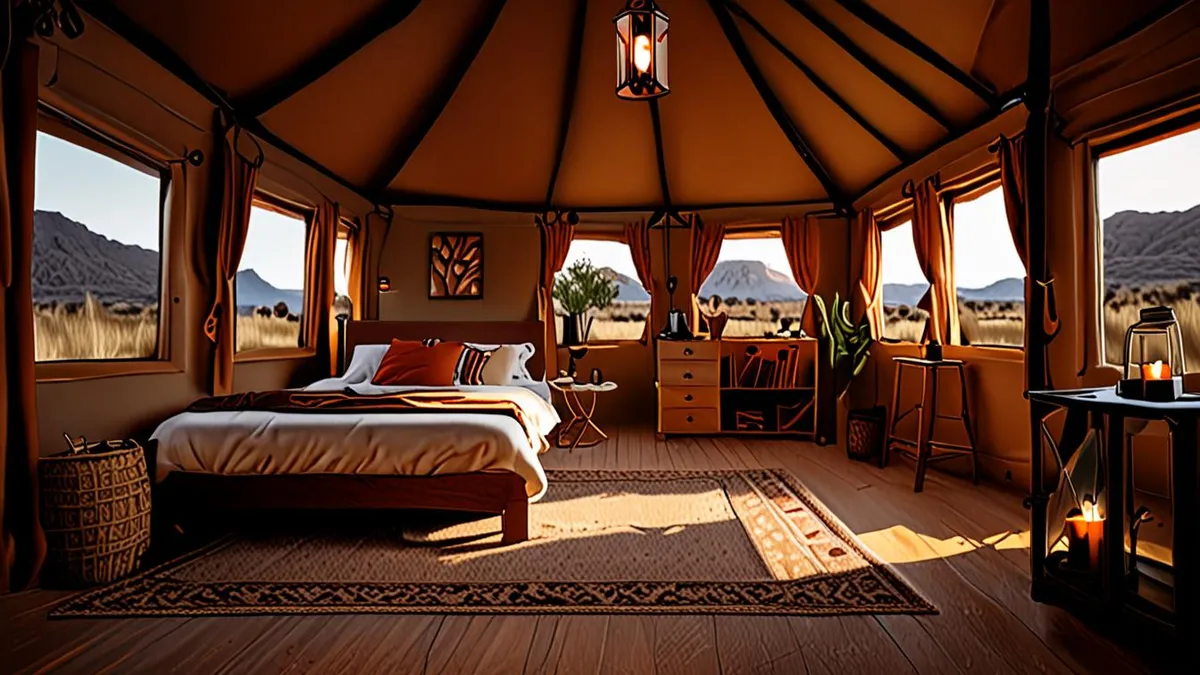
Material choice drives almost everything: weight, comfort, drying time and how the tent feels on a hot afternoon. Canvas (cotton) breathes well and insulates better than synthetics, so it stays cooler in summer sun and warmer on chilly nights. The trade-off is weight: canvas bell tents typically weigh 20-40 kg, which is a real consideration if you are loading it alone. Polyester weighs just 3-5 kg and dries fast, making it the practical pick if you move camp often or carry your tent any distance.
Waterproofing and wet-weather readiness
New canvas needs a 24-48 hour weathering period before it becomes fully waterproof, as the fibers swell when first wetted and seal the weave. Plan to set yours up at home and hose it down well before your first trip. Whatever the fabric, check the hydrostatic head rating: 2,000 mm or more handles steady rain without seeping.
Season matters too. For shoulder-season trips in May or September, nights can turn genuinely cold, so prioritize a tent with a stove jack or enough room for a safe heater. A small wood stove through a stove jack transforms a chilly evening into the best part of the trip, but it only works if the tent is designed for one. Check the manufacturer’s guidance before adding any heat source, and always ventilate properly while sleeping.
Budget: What a Glamping Tent Really Costs
Glamping tents come with a wide price spread, so it helps to know where your needs fall before you start browsing. Entry-level bell tents cost $150-$400, and for a couple of weekends a year, these often do the job just fine. Premium canvas models run $500-$1,200 and typically bring thicker fabric, better zippers, reinforced stress points and a more refined finish that lasts through many seasons.
If you would rather skip buying altogether, pre-erected resort tents usually run $120-$500 per night. That sounds steep next to a one-time purchase, but remember you are also paying for the bed being made, the site being ready and often extras like firewood or a shared kitchen. For a single special trip, the math can still favor renting.
Whatever route you take, budget for the hidden kit that turns a tent into comfortable shelter. A rough rule of thumb: footprint, flooring, bedding and lighting together can add $100-$250 on top of the tent price. Here is what that extra money typically covers:
- Footprint or groundsheet: a separate protective layer under the tent that shields the floor from sharp stones and damp ground, extending the life of the base fabric.
- Flooring: foam tiles, rugs or jute mats laid inside to keep feet warm and stop that cold, plastic feel underfoot on chilly mornings.
- Bedding: a proper mattress or camp bed, sheets and a duvet, since the thin pad included with many tents is rarely enough outside summer.
- Lighting: string lights, lanterns or rechargeable lamps, because a dark canvas tent gets genuinely pitch-black once the sun goes down.
As a break-even point, renting makes sense for 1-2 trips a year, while buying pays off from 3+ trips. If your calendar already shows three getaways, the tent will likely earn its keep within the first season.
When to Go and How Far Ahead to Book
Timing shapes both the price and the experience of a glamping trip. Peak glamping season runs June to August, when sites fill fastest and prices peak. Popular resorts near lakes, coastlines and national parks can be fully booked weeks in advance, and the best-positioned tents — the ones with the view or the private deck — go first.
The fix is simple: book pre-erected glamping sites 2-3 months ahead for summer trips. That window gives you real choice between tent styles and layouts instead of taking whatever is left. If you are bringing your own tent, the same logic applies to campsites, since pitches with the best access and shade also disappear early.
Why shoulder season deserves a look
May and September are the quiet sweet spot. Shoulder season brings lower nightly rates and fewer crowds with mostly stable weather, and you often get the same views and facilities for noticeably less. Mornings can be crisp and evenings cooler, so pack an extra blanket, but many travelers find the trade-off well worth it.
Booking is easier too. For May and September shoulder-season stays, 3-4 weeks of lead time is usually enough, which makes shoulder season ideal for spontaneous trips. Still, check availability before you set your heart on a specific resort — small sites with only a handful of tents can fill up even outside peak months, so a quick email or call early in your planning never hurts.
Packing and Setup Checklist for Your Glamping Tent
A glamping tent is only as comfortable as the setup behind it, and the best insurance is practice. Do a full backyard pitch test before departure, ideally a week or two before your trip. Allow 30-60 minutes for a first bell tent setup — the pole-and-rope system is straightforward once you know it, but wrestling it for the first time in fading light at a campsite is nobody’s idea of a holiday.
That test run also tells you whether any parts are missing, whether the zippers run smoothly and how the tent actually handles a breeze. Pack a mallet, extra pegs and a footprint even if the tent includes a basic peg set; factory pegs tend to bend in hard or rocky ground, and a spare handful weighs almost nothing.
Cold nights are the most common comfort killer, so think in layers rather than one thick solution. An insulated mat or air mattress plus wool blankets handles cold nights far better than a single sleeping bag, because the ground pulls heat out of you faster than the air does.
Finally, plan for the dark. Most tent pitches have no electricity, so bring battery lanterns and a power bank. A few extras worth tossing in the car:
- A door mat or small brush: canvas floors track in grass and mud fast, and a mat at the entrance keeps the sleeping area livable over several days.
- Spare guy line and a repair kit: a snapped rope or small tear in the canvas does not have to end the trip if you carry a few meters of cord and fabric tape.
- Hot water bottles or hand warmers: slipped into the bedding half an hour before sleep, they make a canvas tent feel far cozier on cool evenings.
- Headlamps for everyone: a lantern lights the tent, but hands-free light is what you want for late-night trips to the washrooms.
Wrapping Up Your Glamping Tent Choice
With so many styles, sizes and price points out there, choosing a glamping tent comes down to four simple questions: what kind of trip you are taking, how many people are coming, when you are going, and how much you want to spend. A weekend festival trip calls for something very different from a week-long family stay, and the answer shapes everything else.
Match your tent size to your group using the plus-two rule, so a 4-person tent comfortably fits 2 adults with luggage. Pick canvas if warmth and breathability matter and you can handle the weight, or polyester if you want something light that dries fast. For pre-erected resort stays, reserve your spot early if you are traveling during the busiest months, since popular sites fill quickly. And before you leave home, do a full pitch test in the backyard so you are not learning the setup in the dark. If this guide helped you plan your trip, leave a comment or share it with a fellow traveler.